This is my little place for my creativity.

UPDATE: THE SITE IS MOVING AS OF FEBRUARY 10, 2014 TO:

http://www.emilylikestomakestuff.com


It's time to move on to a place that is more DIY for this DIY-er. Please come on over to see what is up, comment, make suggestions, stalk, or just say hello.
The links are all the same--I have trouble clicking on tiny stuff on my phone so I thought that having it over a few lines of text might make it easier for folks like me.

~~~~~~~~~~~~~

This is more or less a record of my crafty pursuits. I'll use this space to keep track of promising ideas and my own successes or "learning opportunities" for future reference.

Comments are welcome, but will be removed if they don't actually contribute to the content. In other words, comments should have all meat and no time-sucking fillers.

As I complete the projects/ideas on the right, I'll move them to the left so you can see how well it worked out.

Friday, November 8, 2013

DIY - Baby leggings/pants made from adult socks

Here is my photo explanation:
I learned how to do it from this site:
http://sew4bub.com/2011/07/11/5-minute-baby-and-toddler-leggings/

It really does take about 5 minutes.  If you sew by hand, it took me about 30 minutes. I got the socks at Burlington Coat Factory in a packet with 3 pairs for 4 dollars plus tax.  Heck of a deal.

Wednesday, March 27, 2013

Girly stuff


I am always looking for natural ways of dealing with things and, even at my "advanced age", with this pregnancy, I've got some girly stuff issues coming up.

I've explained to my husband that, even though a woman's periods aren't an issue during pregnancy, they really don't stop--they are still there, just waiting waiting waiting and that there will likely be several weeks of it as a "new-parent-gift".  He made a face that said "horror" and then quickly recovered and said, well, it is all natural.  Yeah.  No matter how natural it is, I still am feeling the horror.

I have had some allergic reactions to some of the disposable paper products over the years.  (Tender bits are NOT where you want to develop a contact-reaction!!!) and have been restricted in what I could use because of that.  In a pinch, I have--like all women--used wads of toilet paper or old wash cloths or whatever was available.  (When I travel, I like to use NuvaRing that I piggy back each 3 weeks to prevent the issue entirely.)  I've also tried the Instead cup but I think that I might be a bit different anatomically because it didn't work for me at all (on ultrasound, it appears that I might have a retrograde uterus--perhaps that has something to do with it). 


I have been interested in making my own girly stuff pads for some time and have looked online at various options. While pregnant, I can't really test them for true practicality but I can test them for comfort.  Well, not entirely true--I have gone back to the puking again and I am always fearful that I will pee my pants from the force of it, so I might really get to test them. Hopefully not, though.

Here's the wetbag sewing vid: Sew a wetbag in 2 minutes   Use a polyester zipper--not cotton-it wicks.

 Here is my experience so that you can explore for yourself while learning from my

Common issues:

A.)  Jersey knit is the kind if underwear that I wear and I could not feel any difference whatsoever in having this on versus having only undies.  I have NEVER before not been aware of a pad until now.

B.)  The Eeeewwwww! Factor--If you get some blood on your regular underwear, do you freak out?  No.  You wash them.  No biggie.  Why is this any different?  Duh.  If you got a nosebleed all over a black sweater, would you trash that?  Nope--you'd wash it.  Why is this any different?  Duh.  If you got blood on your towel from a nasty shaving accident, would you trash that?  Nope--you'd wash it.  Why is this any different?  Duh!  Etc.  Grow up and get real.

C.)  Website:   Moldy tampon fresh out of the package
What can I say except:  Ewww.  Ewww. Ewwwww. EEEEEEWWWWWWWW!!!!!
If I ever buy any tampons again, I will be sure they are the O.B. brand that are not hidden inside an applicator that could prevent me from not using something like this.

Projects:

1.) Finally, I bit the bullet this past week with and attempt at making some that seemed logical, reasonable, and practical.
The site: http://empowerwomeninafrica.com/
The link to the tutorial:  https://docs.google.com/file/d/0B1V7eRClUEW4TzFGd2VTQ0wyV3M/edit

I was excited and thought this would be great to try out and then send some on to the charity.  I did not expect these to be horrible for me.  The idea is to have a base that is used to hold an easily washed/dried foldable insert.  The problem for me was that the insert did not stay in the base when I went to pee.  It would stick to ME!  And in my third trimester, I don't always have time to wait--I ended up peeing all over the damned thing and barely kept it from dropping in the commode.

I had already made up several and all went into the trash.  I would only offer these to someone I despise.

2.)  http://www.sleepingbaby.net/jan/Baby/PADS.html

The lower ones are what I made except that I didn't leave them foldable--I stitched them together. they are rectangles--two layers of old tank-top cut 9 inches square, slit in the middle of one layer, turned, folded to hide the turning-slit, stitched down, backed with PUL and tabbed.  I made two and it was hard going with my sewing machine--I will try these first two out this weekend and then either make more or make them like these--to fold up.  (The PUL is from JoAnn's in the three pack for making baby stuff--Normally the 3 cuts are 15$ but we used the 1/2 off coupon and this is the left over parts from cutting some diaper covers.  I turned the kiddie prints to the inside because, frankly, it is just weird for me to have little cowboys and robots on my girly stuff.)

 3.)  I made one that is foldable.  A square that was slit in the middle for turning, backed with PUL (covering the turning slit) with a couple of wings sewn under the PUL with a snap to fasten it.  This was a great idea but not cool whatsoever to wear.  It is just weird to have the layers open up when you are rushing to pee.  Then the wings held together but the thing was sliding backward towards my butt.  Not cool.  Not cool at all.  I went ahead and put a row of stitches across it at both ends to keep it together last night.  I am so glad I am only making one of each kind now and not stuck with a bunch of awful ones that SEEM like a good idea but don't work for me.

4.) An issue I am having is with the item sliding when I am trying pull my undies up or down.  The PUL doesn't give any resistance so perhaps I need to cover that.  I made one long rectangle that was 6 layers of jersey and 2 layers of terry  (one square sewn, turned, with 2 layers of old towel in the middle section, then folded into 3rds, backed with PUL) .  It is without any holder of any kind and is more comfortable than others.   It is also a bit longer.  That one so far is most comfy.  But still not what I am looking for.

The adventure continues....
~~~~~~~~~~~~
Update: January 7, 2014

I have almost no need for these items since our baby breastfeeds on demand.   Most of these that I made have ended up being used for doublers in the cloth diapers. 

Monday, February 25, 2013

Baby stuff-What we've got, what we need, what we think would be cool

Edit:  May 2, 2013
Edit: January 7, 2014  What I wish I knew when I made this list.  Baby is 7 months old.

All of this is still pretty overwhelming but we think we have begun to figure some practical things out.   The Toys-R-Us  online registry was recommended by a couple of folks but the website was sloppy and not particular user-friendly.  Plus we received a wedding gift that was purchased there--it was defective and just needed to be exchanged.  They refused. I never, ever intend to support this company ever again.  There are too many other businesses that DO care about customer service!
 Amazon is much better.  It is easy to see and look over and the options of related items are really neat to see.  I have now returned to TRU and BRU at different locations and have had great experiences. 

BabyRegistry:  http://www.amazon.com/registry/baby/RR9FZ737TC5Y

We've got:
37 bibs  We use them like crazy!  Snaps on them is wayyy better than velcro.  If you are sewing some, I'd recommend it.  The Velcro destroys things in the wash.
2 pairs of sandals and 2 pairs of sneakers
Several newborn-3 month sized clothes, onsies, full-coverage do-hickeys, some shirts, some pants
30+ burp cloths  Used like crazy for about 5 months, now used often
8 AIO newborn diapers (cloth diapers that are self contained)  These were perfect and then, once outgrown, used without the insert all summer as swim diapers.  Don't buy too many--they do outgrow them in a couple of months.  The bigger all-size diapers were really too big until then.
Some cloth diapers without covers-experimental ones I have sewn from internet patterns to try out.
3 pairs of breast pads  I never really leaked.  We use these in the cloth diapers that absorb slowly.  If the diaper is advertised as being designed to keep your baby feeling dry, expect that it will absorb s-l-o-w-l-y.  If you kid pees a bunch at once, it can overwhelm the slowness.  These along with some pad doublers solved the problem.
One drop-in bottle  You can use the Lanisoh bags in these just like the old-style Playtex nursers.
2 Complete outfits for baby 3 month sized
3 complete outfits for babies 6 month sized
3 outfits for babies 1 year sized
8 Regular receiving blankets
6 Keepsake receiving blankets  The blankets were used like crazy and are still used when we go out.  He stopped liking to be swaddled at about 5 months.
Bathing towel-apron Kind of handy.  We still use it sometimes.
3 belly bands for supporting his navel (Peruvian baby fashion)  PITA
Convertible carseat  Baby HATED this and driving was torture for me.  At 3 months, I bought an infant seat that he still uses.  It immediately made all the difference and I could see his head in the carseat mirror
20+ Reusable cloth baby wipes  We use them all the time.
5 pairs of baby socks  Most baby socks suck.  The only brand that stays on is Robeez Kick-Proof. They're cute and He could not get them off at all until he was 7 months old.  It began to be his mission in life at 2 months to try--first by rubbing one foot on the other and then later by pulling. 
Baby pacifier medicine-giver
Baby bottle medicine-giver
6 pairs of socks
4 med sized onsies
year sized outfit with matching bib
Nose frida
Contoured changing pad for a changing table (We plan to use the dryer as our changing table)  Great item.  I made a designer cover that was perfect until we bought a really perfect Halo cover that has "wings" to swaddle the baby.  He started rolling over at 2 months and this made it much easier to diaper him.
Swing  Baby didn't care for it after the first month.
Lidded (baby-food) ice tray  Winner!
1 bottle of baby sunblock
Baby teether
A few baby books :) 
     Pooh and Eeyore
     Animal Babies
     Are You My Mother?
     Animal Colors
Some wooden letter/number blocks
A noisy toy (I couldn't resist--it was on sale and looks like fun!)  WINNER!
Snappi -5  Unnecessary for us.  My husband hated them. The most practical fold for us was just to twist it and use the cover to hold the flat or prefold.
          What is and how to use a Snappi - You'll laugh!
Glass bottles  WINNER!
Flat diapers - cotton, bamboo, or hemp -6
Prefolded diapers - 5
Plastic lidded bin for soiled cloth diapers plus two sized zippered wetbags for this  We put a big brick under this to raise the height.  It works alright but we'd prolly get a regular trashcan with a lid in the future.
Car seat hanging organizer for stuff that is handy to have in the truck 
Pacifiers  He only liked the one-piece hospital kind and loved them for about 3 months then only chewed on them after that.
An umbrella stroller with adjustable handles--With traditional umbrella strollers, the height is for very, very short people and anyone who is normal sized will get a backache quickly. Giant strollers that are huge and take up all the space where you are trying to use them are horrible and usually (IMHO) just to show off when used indoors.  If it can't be lifted one-handed, it is impractical.  Just now starting to use this.  We used carriers/wraps most of the time before.
Real Nappies sample pack
booster seat (high chair)  We finally bought a real high chair.  The little one is not so practical.
sun shades
Baby hangers (for clothes, not the baby-ha!)  We really like these.
Beanie monkey
7 onsies
Pacifier cuddler  WINNER!
Very cool skull romper 
3 pretty diaper/burp cloths
Floaty-spinny-bath-ball-toys  WINNER!
Gift certificate-Amazon
Gift certificate - Wal-mart
Contoured changing pad for a changing table (We plan to use the dryer as our changing table)
Breast pads  Hate these!  They somehow flipped over in my bra and I ended up with the sticky side against my skin.  The ones I made were much more comfy.
Bottle brush  Get one with a nipple brush, too.
Waterproof diaper covers  (5) in newborn size
Cotton toy ball
Baby pants-2
Baby gowns-4 (These were awesome when Isaac was tiny--he loved kicking at them with his legs and stretching in them--I made some cool ones from old T-shirts)
4 swim diapers/ covers
Wetbags (Washable waterproof zipper bags to put used diapers in when we are on the go)  2 is enough for us.  Bright red makes them visible.  Don't expect the daycare to have a clue.


We need:  (Used stuff/garage sale items are fine--we are big on recycling and appreciate extended-use items)

Waterproof diaper covers (3 or 4) in bigger sizes
Breast pump  (I've been bidding on eBay for this one--I am determined to get it for around 40$ instead of the new price of 125$!)  I ended up with 4--I'll make a specific post about this.
Changing pad - washable/foldable for on the go  Winner!
Baby sunblock
Baby first aid kit / meds
More socks
Back seat mirror to see the baby in his car seat from my own rear-view mirror  Gotta have detachable headrests for these--ggggrrrrr......
Pacifiers  (We'd like a few different ones so that he is accustomed to sucking on different shapes and won't freak at the bottle so much when I go back to work)
Pacifier clip - 3 or 4  The ones available to buy these days suck.  The suspender clips do NOT stay on more than a few seconds.  I make good ones as baby gifts now.
Breast milk storage bags to freeze Lanisoh!


We'd like:
A traditional play pen--they aren't sold any more so it would have to be found in someone's attic or garage  Graco Pack-n-Play is perfect. Cosco is a PITA. Get the good one. Really.
Gerber Graduates rest easy spoons--these are highly recommended.
Baby buddy 1st toothbrush  At 6 months, he started enjoying this and it gets use every day.
Red Cross nail clipper with magnifying glass (My eyes aint so hot these days)  Meh.  The magnifier didn't help and any small clippers are just as good.
Baby toys that aren't just colored plastic
Drop in bottles to use with the milk bags

We don't want:
Diaper pins
Dreft-laundry soap (We mix up our own laundry soap)
Diaper rash cremes or ointments--These ruin cloth diapers Coconut oil is perfect!


We plan to make:
Mei tais (2 or 3) baby carriers  Winner!
T-shirts


Friday, November 16, 2012

DIY-T-shirts-Freezer paper stenciling

Now that I am pregnant and my belly is pooching out enough to make me walk weird, it's time for some cute maternity t-shirts.

Note:  My jeans were bothering me within 6 weeks.  I bought some butt-ugly maternity jeans.  Why-oh-why is the tradition to sew a panel in them that goes all the way to the front of the crotch and then make it a completely different color?  Most modern shirts don't hang all the way to the crotch and with the black panel in front, I am sure that it looks like I have wet my pants .  Gggrrrrr...   I do have some pants that are working for me, but for how long, I don't know.  We'll cross that bridge when we get to it.

Now for the shirts.  I've made 5 and have plans to make another from a men's shirt later.

Tips:  Be generous with your freezer paper.  I like to turn the shirt inside-out and iron that on as my backing.  I feel like I get less bleeding and more control with that than a cardbord cutout.

To place my design, I put the shirt on and slobber on my finger enough to mark a darkened circle in the middle.  This lasts long enough to get the freezer paper stencil ironed on.  

Freezer paper is backed with a plastic.  It is NOT wax.  Don't confuse the two.  The freezer paper peels off pretty easily.

Wash the shirt first or buy it at Goodwill. 

Links to sites with directions are below my own project info.  Click on an image to see it better. 

This is my "swallowed a watermelon seed" shirt.  It is cartoon-ish and silly. The shirt was 5$ and the paint was 2 including tax.  7$ for a customized and cute shirt is a steal!

On the directions, it states to spray repeated coats to desired coverage.  It does NOT say to let it dry between coats.  The base colorant does bleed under very easily.  Coverage is nice, but this is a pain in the butt project.  The can clogged horribly and "spraying it upside down to clean the nozzle" didn't work--it DID spray/drip all over the place.  I used a dime that was discolored and creepy as the center of the O.
 Since the above shirt looks like crap, I am thinking that it would be an appropriate diaper cover.  A crappy paint job to hold a crappy diaper. We'll see.


These were my "good paints".  1.) They dry harder than I had hoped.  2.) The bottles are easier to open and deal with, but they will sneakily roll over your art.  Approx 1.75$ @ Michael's.  3.)  The tube paints were easier to handle but opening them means you might squirt it out at your face, hair, etc.  Once the safety foil is off, no problem. I am thinking my old bent sewing pins would be perfect for this.  Unless you are painting huge or multiple items, this set should be more than enough.  It was around 7$ @ Wal-Mart.

I am not the best stencil-cutter-outer.  I dug out an old off-brand X-acto to cut some after trying scissors and a normal razor blade (cover one edge with duct tape and the other edge is ready to go).  I tried running the freezer paper through my printer, but it was as likely to jam as it was to take it.  It was just easier to print out what I wanted, staple it on, and then tear it off while leaving the staples to plug the holes.

Stickers are a great resist that work like magic. One portion of the S in "special" wouldn't come off.  I used a marker to color over it and am hoping it will come off in the laundry.  I used the blade to scrap off stray paint.  It worked a little, but the fabric markers are probably more effective.  We'll see.

Dollar store sponge.  I cut off the un-painted end and tossed it in the baggie with the rest to use later.
2nd attempt at this one.  I wanted it for Thanksgiving day.  I can't even feel him kicking yet, but we have seen on ultrasound that he is a HE.  The can of glitter paint still sucks.  I threw it away even though there is enough for another project.  It was about 6$ @Michael's.
Here are the three shirts waiting to have the elastic put in the sides.  Not too bad, huh?
I would like to make another that says "I love Mommy.  Te amo Papá." in a word balloon that comes from the belly.  I'm not sure that I can justify having 7 maternity shirts though.  After the future Señor Robles is born, I plan to eBay these off, if they still look good.

This is such a popular method to customize your stuff that there are tutorials and videos all over.  Most of the videos are long and boring, though.  Don't bother unless there is a language barrier.

*** Modify a shirt one size up into a maternity top--EASY!
      *** Another tutorial
              ***Note: Don't bother trying to hand sew this, just gather it if you don't have a sewing machine.  For the elastic,  definitely use a machine.

Freezer paper stencil tutorial
      Another tutorial


Baby Shirt-Class of...onsie

Preggo-Halloween shirt

Baby monthly milestone onsies

Maternity calendar shirt

Krylon spray paint tutorial


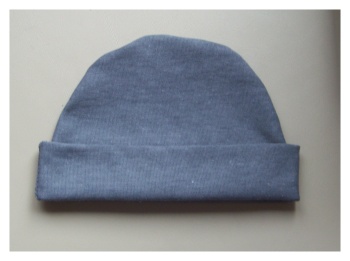
Baby hats!


This bear hat is the one that I have enjoyed making.

Baby Teddy Bear hat to crochet.


Here're more hats to try out.

Baby sun hat  
Sewn baby hat from t-shirt fabric

Friday, August 17, 2012

Making a Quena

A quena is an Andean flute, very common in Perú, Ecuador, Bolivia, Chile, and Argentina.  These can also be found in other places, but the music made with these is notably Andean. 

If you'd like to hear some examples, Peru Folk Radio is my favorite Peruvian station:
http://www.perufolkradio.com/

To start with, say: KEH-huh with the "eh" being like Canadian's say it.  It is not KAY-nah unless you are a complete redneck. If you speak Spanish, you should already know how to say "qué". 

I want to learn to play one so I ordered one from Bolivia.  It has been about 3 weeks and I am still waiting waiting waiting.  Since these are reputedly very easy to make, I figured it would be fun to try.

I elected to use bamboo because I like it and because I already have some.  Specifically, I have the tiki torches left over from the 4th of July that I bought at the dollar store.  Seriously.

Materials:
  1. Screwdriver - my longest one
  2. Clamp - (It came with my Dremel-style tool.)
  3. Work surface - I used a TV tray.
  4. Pencil
  5. Scotch tape
  6. Hammer
  7. Drill
  8. Drill bits
  9. Tape measure
  10. Saw
  11. Laptop videos and sites
  12. Tiki torch (I had 4 of them.)  (PVC is also popular.  Use what you've got.  I have seen sites with beautiful Pyrex ones.)
  13. Superglue - optional--for small cuts on fingers or bamboo that splits a very little bit
  14. Grinding stone - optional--I have one that is 6 or 7 mm at its thickest, in a cone shape.  This was PERFECT for this project.  
Here is the first of a video series in making a quena.  This one shows what you need to make one out of PVC. (You can see the rest by clicking the link below the word "quena" in the title.)

4 min video I wish I would have watched before I ever tried my first time. Good chart. Good demonstration. 3rd video in the series above.
 Websites that helped me:
YouTube: Make a Quena from beginning to end-8 minutes
http://www.youtube.com/watch?v=RZ4GNDk3nck&feature=plcp
At 7 minutes in, he slides the measurements past the camera slowly to read them. 

Instructable: Make 4 Easy Bamboo Flutes-Quena --This makes it look very doable
 http://www.instructables.com/id/Make-4-easy-Bamboo-Flutes-for-free/step3/Bamboo-Flute-End-Blown-Quena/

Translated website that was especially helpful for the mouth portion
The original Spanish Quena-instructions site
http://pacoweb.net/Quena/constru.htm

YouTube-How to Tie a Quena (to help prevent splitting or hide ugly spots)
http://www.youtube.com/watch?v=Hc5G6YKjJaE

Quena Playing:

Old manual that is posted online
http://www.scribd.com/doc/48233255/METODO-DE-QUENA

Brief single page: Posture and mouth position with great image
http://jlfeijooi.en.eresmas.com/quena/posicion.htm

YouTube: Checho - Famous Peruvian quena player giving basic instructions- English subtitles
http://www.youtube.com/watch?v=G1zYc7B4m3E&feature=channel&list=UL

YyouTube: Checho #2-How to hold the Quena and basic notes-English subtitles
http://www.youtube.com/watch?v=KokaUFf0LsI&feature=plcp

YouTube-Michaela Chauque video-very nice demonstration of mouth movements
http://www.youtube.com/watch?v=Rz5_EJnB8yQ&

My Quena making adventure

I started off earlier this week making 2 of them.  They are difficult to play and I can't do anything with them.  OBVIOUSLY, I screwed up.  A little more research after those first two attempts and my 3rd one is much, much better. Each site had differing measurements or, more commonly, vague ones.  I chose to use this set because the mm are more precise than inches and the video was especially helpful.


  1. I chose the tiki torch with the longest space between joints that was also the most aesthetically appealing. (That's fancy talk for "pretty".)  I gathered up the stuff and:
  2. Cut the bamboo. 29.2 cm  I put tape around it to prevent splitting and cut just beyond that.  The tape marked my cutting line nicely.  
  3. Put a piece of Scotch tape down the length of the front of the flute.  You decide where you want your front to be.   
  4. Using the Dremel (or files, if you have them), the mouth will be cut a rounded 8mm wide at the top narrowing down to 7mm wide and 8mm deep.  Angle the cut so that below that 8mm  deep mark, it has a bit of an angle or the look of a slide. try to do a slight angle on the back side, too. Try it out now to make sure it works.  If you have no experience, you can do what I did the first night--I put in a TV show and while watching it, I practiced until I could get a tone.  It took me about 2 hours of goofing off.
  5. If there is a  joint in the bamboo, you will have to de-crud the inside.  Put your screwdriver in the tube and use the hammer to knock it down.  Work it a bit.  You will see the bits fall out. 
  6. Draw a straight line on the tape (I used the side of the package of extra sawblades.)  It might be easier to put the tape on the table to mark it.  
  7. Also mark on this line, 23.7cm, 21.1cm, 19.1cm, 16.9cm,14.6cm, 12.5cm, and on the back, 11.2cm (thumb hole). Measure these from the mouth portion.
  8. Drill these out with a small bit.  You will enlarge them later.
  9. Expand the holes a little. If you want to tune the instrument after you have practiced at it and have some experience, don't enlarge them too much.  Expect to need to de-crud the backs of the holes.  The bamboo has a sort of "skin" running down the inside.  I worked at it with my screwdriver.  I would bet that a brush would work better, but I don't have one handy.
  10. Tie your quena, if you want.  
  11. Play, play, play.
Update:
I got my quena from Bolivia today (August 23).  It is bigger than I anticipated.  Difficult to hold properly and cover all the holes with my fingers.  I think that I only need practice.
Once I have gotten SOMEwhere with it, I will post a vid.
:)


~~~~~~~
Video on playing El Condor Pasa (in Spanish)
http://www.youtube.com/watch?v=bGrgyK47mqg

Circular breathing video
http://www.youtube.com/watch?v=rhZZgzzm_Mg

YouTube collection of individuals demonstrating demonstrations with their quenas
http://www.youtube.com/results?search_query=quena+tocar

Friday, October 28, 2011

Silver Ring from a Quarter

This was a special gift for the person that holds my heart.  When I learned about this technique, I read up on it and learned that this was an activity enjoyed by many sailors  because it is such a small item and can pass the time combined with the cost and uniqueness of it, it is a winner all around.

I looked for every website I could find about it and then sort of went my own way, like I do with everything.

I started out with the spoon, but after 2 or 3 hours of some TV shows, I had absolutely zero discernible progress.  I went with a hammer on one of my wooden TV trays.  One website writer said that he used his covered dumbbell for an anvil and since I had one, that did the trick.  (Note--The dumbbell will be damaged and uglified.  If you care, don't do it this way.  I don't care, personally.  My dumbbells have a purpose and decor it is not!)

Several times I got too enthusiastic with my banging and bent it some (more like folded it). to undo that damage, I'd lay down a coin of the best size inside of it on each side and hammer it as a sandwich.  I began with another quarter, then when the edges had flattened out, a nickel, and finally a one cent coin.  (Note here:  It is NOT a "penny".  That is a term adopted from other cultures. I know it is common, but I'll refrain from using it here.)

When I was ready (probably much too soon), I hammered a nail in the middle, then a fatter one, and so on until I had exhausted my supply of fat nails.  I then tried drilling it out.  Ummm.  DANG-ER-OUSSS.  I gave that up quickly and since the tip on one blade of my cheap dollar store scissors fit in the hole just barely, I began scraping it out with that.  This kept is right in the center and I could see progress with the silver shavings.

I continued with the hammering and scraping for 4 months.   July through October.

Notes:
1.)  It is best if the coin is actually silver and not some combination.  I worked on it for a long time with a softer metal.  I actually watched the entire series of Jeremiah, Jericho, several episodes of Star Trek, House, The Mentalist, Law and Order, Gone With the Wind, maybe 50 movies, and who know what else while working on this. YAY for Netflix!!!!!
2.) To smooth out the outer surface and make it shiny, I used a 7-sided nail buffer that my son left behind when he moved out.  He used it to care for his nails for playing guitar.  I use it for looking girly and to make this.  It worked out really nicely, IMHO.

Tell me what you think.  (Weblinks are below the pictures for anyone else that wants to try.)

I am including all the pictures that I have.  You can see them in better detail by clicking on one and looking at the series that way.

Working on it.
Here it is as I am finishing it up.


In Peruvian culture, more modernized Peruvians wear their bands on the left hand and most indigenous people wear theirs on the right.  (From what I understand, a ring on the left hand is associated with slavery for many people there.).  He wears the gold one on the left and the silver one on the right so all bases are covered if some sancha-wanna-be comes looking at him.  ;)


Here are some websites to get you started.  There are tons more out there and each person has their own way of getting it just right. 


Sunday, October 23, 2011

Back from Perú!

Hi everybody.  I just got back from Lima on Friday.  I figured that I should make a page devoted to that part of my life since it is such an important part. I'll put up my favorite or most interest pictures and describe what was going on in each of them along with whatever else pertains to that.

Here's the page:
http://emilylikestomakestuffdiy.blogspot.com/p/peru.html

Thursday, September 22, 2011

It's been a busy morning.


Today, I made:
Oatmeal pies (really just oatmeal cookies with leftover icing)
Mexicanish sandwiches
Apple-pecan pancakes

I have some dear friends who are battling an anti-health monster right now and have offered to bring them dinner each Thursday evening.  We can visit/chat for a bit and they can get something nutritious that is out off their typical home-cooking menu but still qualified as home-cooking. Tonight they are getting my new specialty - Mexicanish sandwiches, some pancakes for breakfast, and some cookie sandwiches that are designed only to help him put some weight back on. (There is fiber, iron, calcium, protein, and other nutrients in them, but really, they are little fat-creators!)

Here's the Mexicanish Sandwiches tutorial.  These are really delicious.  I don't know if these exist outside my home anywhere, but it is simple and delicious and sort of like a pupusa.

Mexicanish Sandwiches

1 cup of masa (corn flour for tamales/tortillas)
1 cup water
2 or 3 tablespoons of oil 
1 teaspoon chili powder (more or less as you like it)
1/2 teaspoon salt (more or less as you like it)
clove of crushed garlic (if you want--not necessary though.  Add in whatever else you like, too--cumin/comino, lime, magical-mystery-ingredient-du-jour)
Stir these together.
Put it off to the side  to "rest" while you chop:
1 jalapeno
1 tiny onion (I bought some that are about the size of big jalapenos)
Mix these into the masa.   You'll prolly need to use your hands for this. Again, you have the option of adding in whatever you want or have leftover in the fridge.
Smashed beans (I made pintos last night--did the boil-cool-rinse routine 3 times to de-gas them and then simmered them overnight.  After they had cooled enough, I drained the liquid off--be sure to save some--and used the mixer to "drill" them up.  Add the liquid back in as needed. This dish is easier if they are not very runny.)
Cheese (I used American slices because that is what I had.)

Heat up a skillet to scorching hot. If sprinkled water dances on it, you're probably ready. Wet your hands (the water on your hands reduces the amount of stickiness of the masa mixture). Grab a golfball sized amount and flatten it out with your hands.  It should be pretty flat but not so flat that you can't get it off without tearing it.  This may take some experimentation. (The disasters are still pretty delicious.)

With my electric stove set to 8, it takes one minute for this to be ready to flip.  I use my stove timer and just flip it over.  The underside (that is now looking up at you) should appear dry with a few scorch marks on it to indicate that it is actually cooked.  You can cook these to the amount of your liking.
When both sides are equally cooked, put that one a plate and plop in your next one.  I took a half slice of cheese, spread some smashed beans over it, and then topped it with another one.  These are pretty and pretty delicious.

I might experiment with topping them with enchilada sauce and salad next time.
As it is, I now have several of these wrapped in foil and then put in a gallon bag in the freezer for my lunches at work.  I might even pack up a few to take with me to Peru to prove to my family there that I really can cook (when I am not in their kitchen where they don't have the same tools and I can't read the labels on any of the ingredients).
:)
If you want to vary the amounts or make only enough for one, then use equal parts masa and water.  Everything else is just a throw-in.
If you are wondering about how I came up with this, it is really just a Prayer-Meal.  This is when you stand in the middle of your kitchen and pray, "Please, Lord, help me create something that is delicious and nutritious at the same time."  When you are low on supplies, it's always a prayer-meal to the rescue.

Thursday, September 8, 2011

COOKIES!!!!! Sugar cookies. With royal icing. Yeah.

This was a lot of work.  But the result is spectacular.  Even if I could not figure out how to end oeach of the "writings" without a twisted stringy-ness or a mess in general.  I added some Tru-lime to the mix of both the cookies and the icing and it really makes a nice accent.  I ate 4.  I think  I need another.  Now.

Click here for Sugar Cookies 101


For the icing, I didn't have any Karo so I used cream. (Whipping cream).  I also skipped the lemon.  I bet this would be great with peppermint.


Note:  When naming your kids, pick a short name that will fit when written on a cookie--4 or 5 letters max.

Friday, September 2, 2011

White cake with lime

Now THIS was a yummy cake.  I was mixing up the white cake, determined to have something really delicious made when I thought about adding some lime to the mix.  I searched and found two petrified limes in the door of the fridge and juiced them.  I got maybe 4 table spoons of juice out of them and just went ahead with the baking as usual.  I then made a glaze.  I elected to not stack the cakes this time since I was just experimenting.  I poked holes all over the first pan and spooned 1/2 cup of glaze over it to sink into the holes.
Glaze
1 stick butter
1 cup sugar
juice of 4-5 limes.
Normally I'd add some zest, too because it is delicious and super pretty
Boil it. Cool it. Spoon it over the cake.
Very easy and no precision needed.

Cake recipe


After finishing messing with the 2nd layer, I IMMEDIATELY cut it up and put it in the freezer because it was too tempting to eat it all.  I would have if I'd been able to. Very yummy.  I think that I'll try this again with oranges when winter comes and fresh picked oranges without chemicals are in season here.  MMmmm.....

Dang it.  I forgot to take a picture.  I think this means that I'll just have to make another one!

Carrot cake made with baby food

This carrot cake was not too moist and not too great but it was the first time I ever made cream cheese frosting and it was worth it just for that.  I packed up the remainder of the cake to give away and there it went.
Carrot cake made with baby food instead of fresh carrots

This recipe also called for nuts in the frosting.  That was a bit disastrous.  I normally like nuts in a cake but not this time.  The total cost for the cake was 5$.  It would have cost me 3$ if I had not wasted the nuts in it.  Live and learn.

The price for a similarly sized carrot cake in the grocery store was 9$.  I am guessing the quality would be about the same.  Very ho-hum.


 I can't imagine not having actual carrots in a carrot cake so I stirred some in.  

Sew-Pencil bags

I'll be in South America again in 4 weeks and 4 days .  While school supplies are on the crazy cheap discounts, I have been buying x4 of each useful item that was under a dollar.  I've got pencils, folders, glue sticks, scissors, crayons, erasers, rulers, spirals, paper, toothbrushes, socks, and super el-cheapo backpacks to hold the stuff together.  I was thinking that I would put the small stuff together into a ziploc but after I saw this, I thought it would be better and certainly longer lasting.  I made 4 different ones.
Pathwork fancy zipper pouch
or
Simple zipper pouch

The first link had a tip of sewing a tab to the end of the zipper.  I quickly remembered (after screwing up, of course) the value of this when I was testing one of the zippers and zipped the key right off the teeth. Sigh.

I made the first one lined and it is cute, but definitely weighs more and right now, everything I pack is about the weight.  No packaging of anything is going and what I can reduce, I will.  The lined one was also a PITA because I forgot to UNZIP the thing when I was closing the final seam.  Yeah.  I'm a rebel and rebels always have troubles. Sigh again.

On the other three, I couldn't see any reason to line the pouches.  They are for kids and like kids everywhere, I am guessing these will take a beating in general so I am not too worried about them lasting longer than a year or two for those kiddos if the items all get used up and/or abused up.  All part of learning, IMHO!

Each backpack contains about 8-9 dollars of actual cost and probably about 20$ value because of my frugality.  There are 4 kids that are the right age to receive these in Carlos' family in the home village so I hope they can enjoy these very much.  There are also 2 little kids that I will see if I can make a toy or two for them also.  I've gotta find out their ages first.


~~~~~~~~~
Update:  I found this tutorial and I think it explains the stitching better and the pattern is darling.
 "Pencil" bag
~~~~~~~~~
Another Update:
Here's a couple of pictures of a young shepherd with his backpack of goodies.  All the other kids in town were at a soccer match that was exciting enough that the church was even closed for the day.  The town was EMPTY as we wandered around and ran into this young gentleman working. 

Thursday, August 25, 2011

Emily's Guacamole & How to cut an avocado

Carlos, this posting is all for you.  (No, not that Carlos. This is for my best buddy from Madrid.)

Seriously, I know this is one of the easiest crowd-pleasers to make.  But, often,when I get it in a restaurant, it is not so great.  If you have never had it made fresh and right, you have never had it really good.  Here's how I do it and you can, of course, supply your own variations.
Here's how to prepare your avocado.  
1.)  Slice it lengthwise.  You can go crosswise, but long is easier.
2.)  Twist it to separate the halves.
3.)  Visualize the pit/seed.  
4.) Holding the half in your hand, strike the pit with your knife blade to sink it in just a bit.  Usually I don't go deeper than a screwdriver.  A sharp knife is better here.  A dull knife will slide off and hit you.  Has this ever happened to me?  Yes.  But I have never gotten cut.  I am not striking with enough force to chop down a tree--just enough to slightly hack into the pit.  
5.) Holding the half securely in your hand by the peel, twist the pit using the knife.  It normally will come right off.
6.)  I have used this method for more than 20 years, including working at Taco Villa.  It has only failed me 2 times, both of them today.  Thank you, Murphy. (I just dug the pits out with a spoon along with all the woody chips that I had hacked off-haha.) 

Ingredients: 1 jalapeño, one small onion (I like yellow ones), a lime, clove or 1/2 spoon of garlic, maybe 1/2 teaspoon of salt and 1 avocodo (or 2), very ripe.
Note:  Your avocado must be black on the outside (unless it is a giant one from the Caribbean) and a bit squishy.  (This is the problem with most restaurants, the avocados aren't even ripe.  They are usually still hard and not ready to be eaten.  This, my dear, is the true secret to good guacamole!

Last night, I got a bag with maybe 12 or 14 avocados for a dollar.  Why?  Because they were all RIPE now.  Perfect.  I am in true guacamole mode today!

To make things easier, if you want, throw your lime juice in the blender with your pepper to grind it up.  You can throw in the salt and garlic, too.  It is much easier than trying to chop them up.  Mash up your avocado, blend in your other ingredients and add the chopped onion last.  Let it set for a few hours to supreme goodness.

One more note.  How to chop an onion safely.  I am not sure why folks like to sometimes slice it like for a hamburger and then try to chop it while holding it in their hands like that.  It seems like a sure fire way to end up in the ER to me.  (Not that I am saying that I have ever seen that, nope, not me, never heard that from anybody.  HINT HINT)

Just humor me and do it like this.  Slice your onion in half and peel the outer 1 or 2 layers back.  If you leave them attached, you have a sort of a handle to give you a bit more control.  Slice it lengthwise and then down the flat part that is not touching the cutting board.  Ta da!  Perfection!  No blood.  No injuries.  No stitches.


If you won't be serving it right away or if you were out of lime, you can place the pit in the bowl to protect the color.  Blackened guacamole is still delicious, but a bit gross looking.
One more note:
If your limes are smallish, Key-limes and they are old, the juice may be very bitter.  I still like it, but it may not be the favorite for your friends from Spain.  (Carlos, I have a baggie of perfect-guacamole in the freezer for you right now.)